Showing posts with label remodel. Show all posts

8/12/20

BACK TO BASICS

'Basic' is exactly where The Hubs and I are right now.

After our downstairs remodel 4 years ago, we moved our attention upstairs and updated the master suite and my office and made plans to re-carpet the hall and redo the guest bathroom and the other bedrooms as time and funds permitted.

But, a couple of months ago we noticed that downstairs, our beautiful new wood flooring was looking a little strange in places, and I could hear water when no water was on, specifically in the laundry room....


Three weeks later, with a slab leak under our belts, rerouted pipes, a storage crate on our driveway, flooring and drywall removed, and a week with noisy, hot, annoying drying machines, we have a large empty space and are looking at the basics once again...

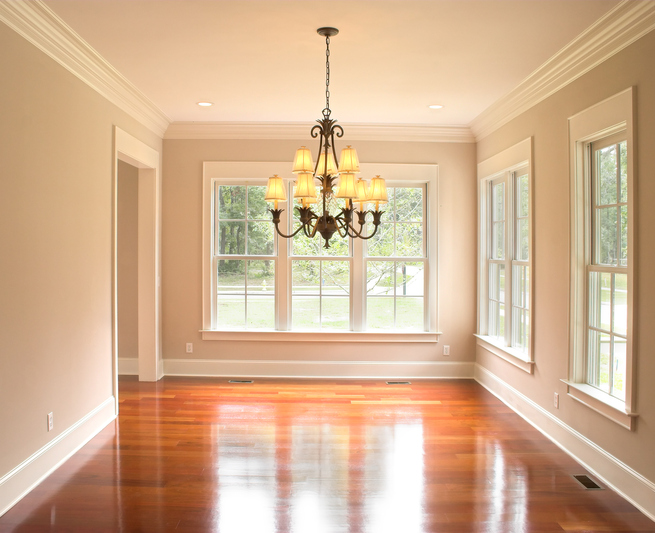
Flooring.  Paint.  Moldings.

Basics every room in every home requires.

I am always amazed at the impact those 3 simple things can make in a space.  As I do this daily, it probably should NOT amaze me - but the impact a change of paint color or flooring or the addition of some details like molding and trim have in a room - kind of blows me away.  Every home needs floors and paint - and hopefully the choices made will add warmth, texture, color, interest and perhaps charm.  These things alone can change a plain box into a place that invites.

Basics create the backdrop for everything that makes a house a home.

Over the years I have seen some really bad choices - (your contractor/painter is not your designer, no matter how sure he sounds about that paint color or that wainscoting style.)  It helps to have a whole house plan and to carry the design aesthetic throughout the entire house.

I do love a room re-do from time to time, but this time our house is going back almost exactly as it was. We were happy with what we did in the remodel.  Four years later we were still happy.  We were lucky enough to be able to find the same gorgeous wood flooring to replace the damaged areas and were able to salvage the built-in bookcase.  It looks good as new again.  The Hubs is happily filling it with his beloved leather book collection as I write.

In the middle of this dusty disaster, I couldn't help thinking of the opportunity I had to make a few changes. Since we were basically a construction zone, including noise and dust, I add can lighting to the family room and changed the look of the mantle and fireplace (The Hubs has hated that fireplace for over 18 years - it came with the house - we were due for a change).  The demo required us to replace the wainscot in the powder room, but I changed it up a little with a shiplap treatment.  In the laundry room - a room I had yet to upgrade, we added a high board and batten wainscot and will add a sink and open shelving.

I've always had a big pet peeve in the family room - all the media cords!  We have surround sound speaker cords, tv cords, blueray cords, receiver cords, cable cords - I  have a big 'rat nest' jumble of them behind my media case. I'm quite sure there are several thousand feet of wire and cords we don't need back there, but I would never be able to put it all back together if I disconnected them.  This is perfect timing to unravel that rats nest and make some sense of it.

Its been a few years since I've had the opportunity to really edit my home accessories.  As I put things back into place, I'm taking the time to clean house and redo - something we should all do every few years so we don't fall into the 'hoarder' or 'clutter' category, or even worse - the 'out of date' category.  In fact, if I'm honest, this is a perfect opportunity, as we unpack the big giant crate on the driveway, to KonMari our possessions.  So, if it doesn't 'spark joy', it will be looking for a new home.  I'm quite sure we will have quite a large KonMari pile.

Keep your fingers crossed for me!
8/23/16

THE AMAZING FLOOR - BEACH HOUSE PART 2

Another installment of
THE BEACH HOUSE
BIG RENOVATION, little budget


If you missed Part 1, check it out here.   
I'm renovating a beach house using as much salvage and green material as possible.
Working on a very tight budget, and this house needs a lot of work
both inside and out -
luckily, my client, Shawna, has a good eye,
(she's an amazing photographer who works with natural light)
a great design sense,
and the ability to think outside the box - 
you can always tell a true artist that way, right?
someone who doesn't just follow trends like a lemming, 
but who can set their own?

I'm sure that she would have preferred to have a house that was already improved,
the budget to install new floors, a custom kitchen, and be able to purchase new furnishings...
but fate and a divorce has dictated that this house and a lot of elbow grease is her future - 
which she has accepted with dignity and a sense of adventure...

This little house is unique
and we definitely want to preserve that


Like these round porthole windows on either side of the fireplace.

I'll admit my first thought was to remove them and use that spot for built-ins - 
but she felt they were part of the old original beach house charm - 
just kind of quirky and fun.
and she's right,
we should preserve some of the details that make this house unique -
so they will stay....


We didn't feel as sentimental about the patched up and smoke stained brick fireplace
or the bare wood paneling that is original to the house - 
so the whole wall got a coat of paint.


There are two entrances to this living area - this one is off the large front deck or patio.


French doors let in lots of yummy natural light
and ocean breezes.
The actual front door at  the front of the house is flanked by two smallish windows.


We will be replacing these for larger versions, which will let in yet more natural light 
as funds permit.  
We are looking for two used or salvage, matching windows.

I have to admire Shawna's determination to get all the improvements done 
before she begins the interior decoration. 
 
I'm chomping at the bit, but she is able to take it all a little at a time.  
Still, she has managed to make it cozy and comfortable in the interim - don't you think?
(She was way ahead of the game on the taxidermy that's so on trend right now.
This was a find years ago she worked on with her Dad - finding the antlers and head separately and putting them together.  He keeps gentle watch over the living room.)
But this post is all about the flooring.
Being a vintage home that started as a little beach cottage and grew over the years as owners added to it - the flooring was a patchwork of several different materials.  
There was very old original 2" hardwood in the living room,
newer 4" oak flooring in the kitchen (with weird buttons),
and some worn and slightly gross carpet in the bedrooms.

The carpet was the first to go - Shawna had to get that out of there even if she had to live on plywood sub flooring for a while!

Then the question became what type of flooring could we put in throughout the house that was affordable - durable - and would still have a beach cottage vibe.  
Shawna really wanted wood, but hardwood flooring was WAY out of the budget..

I have lived in a lot of different countries - including the UK and the South Pacific - and I've been in many an old house, and many a beach house.  I started thinking about the floors I had seen in these places; simple pine plank floors that just took on more character with each scrape and ding and I suggested we look into a wide pine plank floor...
just simple stained pine we could install ourselves 
(I say ourselves, but I'm really meaning HERSELF - :)

She needed to see what I was talking about - 
and no one is actually doing that these days.... 
except for this wonderful shop called Tuvalu in Laguna Beach.  
They have installed pine plank flooring over their entire shop.
We took a little trip to Laguna to check it out - and it was perfect!
The more traffic and distressing it receives, the better it looks.   

Pine is a soft wood - so we can pretty much guarantee the 'distressing' part - 
and this is a beach cottage, people.... 

it's the perfect floor, 
its the perfect look, 
its the perfect budget.

And so she did it.
It took a lot of courage, but Shawna is not one to shrink in the face of a challenge!
and with a little ingenuity, she mixed the perfect stain color

and stained all of those pine planks....
and with a little help from her family

the 'out of the box' floor became a reality.

I install many floors in homes that are more beautiful -
with materials more elegant and costly
from hand-scraped hardwood to breathtaking marble -
but I think in all honesty, 
this floor is my favorite.
This floor was created with love, faith and courage - 
and a lot of elbow grease.

Just needs a top sealer, and they're done!

So proud of you, Shawna.
Ignore anyone out there who has so little talent or ability or human kindness
that they can't see the beauty of what we are creating here:
A home - created with love, determination, strength of character and the need to
make a place where family can gather - on a practically non-existent budget.
Each step we take, each part we create
is a little miracle.
I'm blessed to be included in this endeavor.

Here's a recap of the progress we have made in the living room:


PROGRESS:

Popcorn (acoustic) ceiling removed, plastered and repainted

Wall between living/dining/kitchen areas removed to create an open living area

Installed a salvaged dutch door for the front door

Walls/paneling and brick fireplace - painted Sherwin Williams, Accessible Beige.
(a cool grayed down light beige)

Pine plank flooring installed


Living room furniture: Shawna purchased:
 2 slip-covered love seats,


a chaise, 


and 1 ottoman -  all second hand from Craigslist or Close5.
(this girl finds the most incredible stuff!)


Still to do:
LIVING ROOM:
Replace small windows with larger windows
Faux beam and/or beadboard ceiling treatment
Add baseboard and crown trim
Repaint all doors and trim
Create built-in shelving on both sides of fireplace under porthole windows
Chunky fireplace mantle
Ceiling fan
Light fixtures
Furniture arrangement
Accessories and decorating


Please follow this blog and support Shawna and the beach house project.
Bless you!

4/28/16

BEACH HOUSE Part I - BIG renovation - LITTLE budget

COASTAL LIVING...
I love working at this little house.  The hottest days are cooler here, and the days that feel a little cooler at my foothills home, are warmer here at the beach.  


Then there's the air, and the smell of the ocean, and the laid back lifestyle,
Bleudog Fotography

and this quirky little house we are turning into a home.  I posted a while ago about the renovation on this cute little beach house.  It belongs to my friend, Shawna, the photographer.  (Yes, she's the photographer I use for my projects - those beautiful photos that make my work look so good!)  She's divorced but still working on the settlement end of things... so currently poor as a church mouse.  (Of course he isn't...right?)  She's struggling to make ends meet and provide a home for her kids.  So - the budget, when we can find one - is tiny, tiny. We rely on volunteer labor and lots of good finds.  While we have made progress, its mostly been behind the scenes. There is a lot to do because, like most old coastal homes, there have been additions to it over the years.  The plumbing and electrical that were added in the past additions turned out to be sub-par and possibly dangerous, so those items needed to be taken care of - pronto!

Still, the house has its charms, and I'd be less than truthful if I didn't tell you I've completely fallen under the beach house spell.  Silly round windows, odd angled additions, mismatched flooring, it has tons of charm.

And fresh Pacific breezes.  I also haven't told you the most important part...  

We are doing this renovation as cheaply as possible, and as green-ly as possible.  We are reusing, recycling, reclaiming wherever possible - and we will be posting our progress and our DIY solutions to making this home fat on comfort and charm and skinny on budget.


Shawna has such a wonderful eye and her work is filled with beautiful light - (see her work here.)  It's so fun to work with her, because she doesn't blink when I suggest something completely out of the box - in fact most of her suggestions are in that neighborhood, too.  Can you say 'unconventional'?  We were destined to be friends.

And...if you haven't signed up to follow this blog yet, over there on the right side (top), do so now, as you won't want to miss a single installment of this renovation.

We've actually made quite a bit of progress, although, as I mentioned,  its not all stuff you can see... We started in the master bedroom - a long and narrow room, made narrower by the addition of a long closet along the inside wall of the room.

My client is a seeker of light - loves it - and her photography is all done in natural light so its kind of her signature as well - and this room was a dark cave.

The laundry was also located here in the master bedroom - (I did mention this house is quirky, right?) -

I think this was the result of not one, but two additions to the house, as the flooring stops and starts a couple of times and it just feels a little awkward.

from the too large bed - looking to the laundry spigots...
now that's a master suite to be envied!
So, we made a plan to remove the washer/dryer hookups and make that into the clothes closet for this room. The existing closet was the main cause of this room being narrow - and once it was removed we would gain much needed space for living.

But first there were a few obstacles to move...like vent pipes and drains that were hidden in the closet needed to be moved...


Shawna also wanted to add a french door and replace old non-working aluminum framed windows. (I think if she could, she would have french doors in every room.)  She started the search at salvage yards and Craigslist.

Because space was at a premium here, we also needed to replace her large, chunky 4 poster bed with a more streamlined bed.  She was very fond of that bed... but she was on board with whatever we needed to do to make the space work.  She also needed clothes storage and somewhere to put a flat screen.

And a floor.  She really needed a floor.  She was walking on a combination of old floor and sub-floor.

old narrow oak flooring and sub-flooring meet in the master bedroom

We needed better lighting in this room and we needed to figure a way for her to have privacy since all windows in this room are street side.    Here is our check list and progress:

MASTER BEDROOM PROGRESS:

Removed popcorn ceiling

The popcorn acoustic removal was easier than anticipated,
thanks to our volunteer crew!  It pays to have friends!
Finished basic electrical for this room.

Moved laundry out of bedroom
and thankfully, some of those friends have mad skills...
Created closet where laundry area was and
added closet doors
the louvered doors were a salvage yard find...


Removed existing closet
Shawna discovered you don't need mad skills for demolition....
Moved drain/vent pipe found in closet
(see picture above..)

Added french door
These amazing diamond pane doors were a salvage find.  
(I'm taking her with me when I shop flea markets from now on - 
this girl has the best luck finding wonderful things!)


Created a dresser for clothes storage
Basic kitchen drawers, made to fit this alcove, work just fine for clothes storage


The dresser top was created from the demo'd old fence around the property...


The leaf shaped pulls were a Home Goods find..


Installed new flooring
we went way out of the box here - we used simple pine planks for flooring -
(its a beach house, after all)
and a custom mix of stain was all it took to make it look fabulous

and yes, we will be telling you all about it, and DIY blow by blow, on a future post...

Obtained a smaller profile bed frame
Used. A Craigslist find...
.
sharing...
A tight fit, but it works..
Found a desk
another Craigslist find...
it was green and gold when she brought it home

Shawna is currently in the process of transforming this desk with Annie Sloan 'Old White' chalk paint.

Found desk chair to go with desk...
A Home Goods find... it was perfect


Installed a privacy curtain
another Home Goods find...

Shawna feels quite cozy at night with the curtain drawn...

Privacy fence installed
you can see the completely inadequate existing fence next to the patio table

ahh... much better - and the yard is immediately larger, too.
STILL TO BE COMPLETED
Replace and move window  
Ceiling fan
Paint
Moldings/trim
Beadboard ceiling treatment
Recessed ceiling lighting
Bedside pendant lighting
Pocket door to bathroom
Comfy chair
Window treatments
Rugs and Accessories
Top coat treatment for floor - polylurethane


If you would like to help in this renovation - we are open!  If you have a salvage or recycle business, have reclaimed wood, old windows, gently used furniture or appliances or fixtures, or know of someone who does - please please let us know.  We are serious about making this a budget conscious, green minded project!  We need your help and are happy to feature your business as we go along!
****************************************************************************


QUESTION FROM A READER:


Hi Claudine,
Your blog is super informative and you certainly know your stuff!!

I desperately need some advice and hoping you can help.  I recently painted my living/dining room Balboa Mist, and it turned out really cold with a very strong blue undertone showing through.

 I was hoping to update and modernize my home from the yellow paint that I had inherited from the previous owners.  I did some research and found that the blue undertones in the paint may have been brought out by the  Brazilian Cherry floor (which I also inherited).  The room is not very bright, but there is a window in the living room facing west, and a smaller window in the dining room facing east.

I have been religiously reading up on the greige craze, and would like to incorporate some of that into my home, but not sure if there is a warm and bright enough paint colour that would suit the room.

I have tried out test samples of revere pewter and it looks awful and really muddy with blue/green undertones.  I was thinking of maybe lightening it by 50%.

I am also wondering if Edgecomb gray or Pale Oak would be a good choice for the room.  Or should I just abandon greige altogether and go for the traditional beiges like Manchester Tan/Natural Linen?

I also just saw a really nice colour "Gray Mirage", what do you think of that?
Please help!!
Dordana

Dordana,
Ahhh, the trial and error stages of paint selection.  I would certainly say that Edgecomb Gray is a lovely color, as is Pale Oak.  You may also try Sherwin Williams Accessible Beige and Amazing Gray.  The ticket, as you have been experiencing, is trying it out first.  The direction your home faces, the amount of greenery around it, the size and shape of the room - the existing colors in the room - all of these factor in to how paint colors will look.  I wish I could tell you that Manchester Tan, or Gray Mirage are going to look great and are fail proof - but that is just not the case with color.  So many factors contribute!  You just have to try them....   I can say that if you are continually getting blue or blue green undertones, that you probably have north light.   But I can also say that your neutral wall color will become background once your furnishings are in place and your accessories and fabrics are set. Sometimes we panic when we just really need a little time for things to settle.  But try some of these colors, and the SW Colors - I think if you go for more of a warm undertone you may find a color that works.   Accessible Beige is a good one to try.  Good luck!  

WHAT DID YOU MISS?

link within

Related Posts Plugin for WordPress, Blogger...